【Linux】下ssh连接慢的原因调查及解决方案:Failed to activate service ‘org.freedesktop.login1‘_ timed out
🍁博主简介
🏅云计算领域优质创作者
🏅华为云开发者社区专家博主
🏅阿里云开发者社区专家博主
💊交流社区:运维交流社区 欢迎大家的加入!
最近有一台线上的服务器,发现使用
xshell等工具进行连接的时候特别慢,大概输入密码后要20秒左右才能连上,有的甚至使用finalshell工具连接会直接报错channel is not opened.,以下记录一下排查过程及解决方法;
- 网上查询的一些说法
通过网上的一些查询,发现大都是因为设置dns,hosts或者通过
/etc/ssh/sshd_config关闭UseDNS=no和GSSAPIAuthentication no的方式来解决,但我的问题和这些不同,首先我是通过ip连接的,不存在dns域名解析的问题,并且sshd_config文件中的这些设置项也都是no,因此自己通过调查,发现是以下原因引起的:
排查思路(四种方法选一种即可)
使用 ssh -V root@ip 来查看具体的连接过程
ssh -V root@ip

#指定端口查看连接过程
ssh -V root@ip -p port
OpenSSH_6.9p1, LibreSSL 2.1.8
debug1: Reading configuration data /etc/ssh/ssh_config
debug1: /etc/ssh/ssh_config line 21: Applying options for *
debug1: Connecting to x.x.x.x [x.x.x.x] port xx.
debug1: Connection established.
debug1: identity file /Users/yyq/.ssh/id_rsa type 1
debug1: key_load_public: No such file or directory
debug1: identity file /Users/yyq/.ssh/id_rsa-cert type -1
debug1: identity file /Users/yyq/.ssh/id_dsa type 2
debug1: key_load_public: No such file or directory
debug1: identity file /Users/yyq/.ssh/id_dsa-cert type -1
debug1: key_load_public: No such file or directory
debug1: identity file /Users/yyq/.ssh/id_ecdsa type -1
debug1: key_load_public: No such file or directory
debug1: identity file /Users/yyq/.ssh/id_ecdsa-cert type -1
debug1: key_load_public: No such file or directory
debug1: identity file /Users/yyq/.ssh/id_ed25519 type -1
debug1: key_load_public: No such file or directory
debug1: identity file /Users/yyq/.ssh/id_ed25519-cert type -1
debug1: Enabling compatibility mode for protocol 2.0
debug1: Local version string SSH-2.0-OpenSSH_6.9
debug1: Remote protocol version 2.0, remote software version OpenSSH_7.2p2 Ubuntu-4ubuntu2.1
debug1: match: OpenSSH_7.2p2 Ubuntu-4ubuntu2.1 pat OpenSSH* compat 0x04000000
debug1: Authenticating to x.x.x.x:xx as 'root'
debug1: SSH2_MSG_KEXINIT sent
debug1: SSH2_MSG_KEXINIT received
debug1: kex: server->client chacha20-poly1305@openssh.com <implicit> none
debug1: kex: client->server chacha20-poly1305@openssh.com <implicit> none
debug1: expecting SSH2_MSG_KEX_ECDH_REPLY
debug1: Server host key: ecdsa-sha2-nistp256 SHA256:HictrRpAs7Yv495dDLNqHsFCNKXVACpX9FWUnNVenZU
debug1: Host '[x.x.x.x]:xx' is known and matches the ECDSA host key.
debug1: Found key in /Users/yyq/.ssh/known_hosts:38
debug1: SSH2_MSG_NEWKEYS sent
debug1: expecting SSH2_MSG_NEWKEYS
debug1: SSH2_MSG_NEWKEYS received
debug1: SSH2_MSG_SERVICE_REQUEST sent
debug1: SSH2_MSG_SERVICE_ACCEPT received
debug1: Authentications that can continue: publickey,password
debug1: Next authentication method: publickey
debug1: Offering RSA public key: /Users/yyq/.ssh/id_rsa
debug1: Authentications that can continue: publickey,password
debug1: Offering DSA public key: /Users/yyq/.ssh/id_dsa
debug1: Authentications that can continue: publickey,password
debug1: Trying private key: /Users/yyq/.ssh/id_ecdsa
debug1: Trying private key: /Users/yyq/.ssh/id_ed25519正常来说是有这么多的,如果只有一行的话OpenSSH_7.4p1, OpenSSL 1.0.2k-fips 26 Jan 2017 ,可以使用另一种方式查看ssh连接过程。
查看ssh连接日志
可以通过查看SSH连接的日志文件来了解SSH连接期间所执行的操作。SSH连接的日志文件通常位于
/var/log/auth.log(Ubuntu和Debian)或/var/log/secure(CentOS和Red Hat)。
可以使用以下命令来查看SSH连接的日志文件:
sudo tail -f /var/log/auth.log  # Ubuntu / Debian
sudo tail -f /var/log/secure   # CentOS / Red Hat
这将显示实时的SSH连接日志。您可以查看每个连接的详细信息,例如连接时间、来源IP地址、用户名、认证方法等。如果您想查看连接期间执行的操作,可以查看日志文件中的命令历史记录或系统日志。
- 连接上之后执行命令,持续查看日志输出;再开一个窗口去观察连接都执行了什么
去开一个新窗口连接,已连接的窗口查看日志
[root@mail2 ~]# tail -f /var/log/secure

Mar 29 13:25:35 mail2 sshd[71370]: Accepted password for root from 122.22.22.1 port 53431 ssh2
Mar 29 13:25:44 mail2 useradd[71439]: new user: name=333223442, UID=22123, GID=1004, home=/home/333223442, shell=/sbin/nologin
Mar 29 13:25:44 mail2 passwd: pam_unix(passwd:chauthtok): password changed for 333223442
Mar 29 13:26:00 mail2 sshd[71370]: pam_systemd(sshd:session): Failed to create session: Connection timed out
Mar 29 13:26:00 mail2 sshd[71370]: pam_unix(sshd:session): session opened for user root by (uid=0)
Mar 29 13:26:00 mail2 sudo: pam_systemd(sudo:session): Failed to create session: Failed to activate service 'org.freedesktop.login1': timed out
Mar 29 13:26:00 mail2 sudo: pam_unix(sudo:session): session opened for user root by (uid=0)
Mar 29 13:26:00 mail2 sudo: pam_unix(sudo:session): session closed for user root从这可以明显的发现中间有timed out这个单词,这个就是报错信息,连接这个超时。
报错信息:pam_systemd(sudo:session): Failed to create session: Failed to activate service 'org.freedesktop.login1': timed out
通过查看sshd状态查看
systemctl status sshd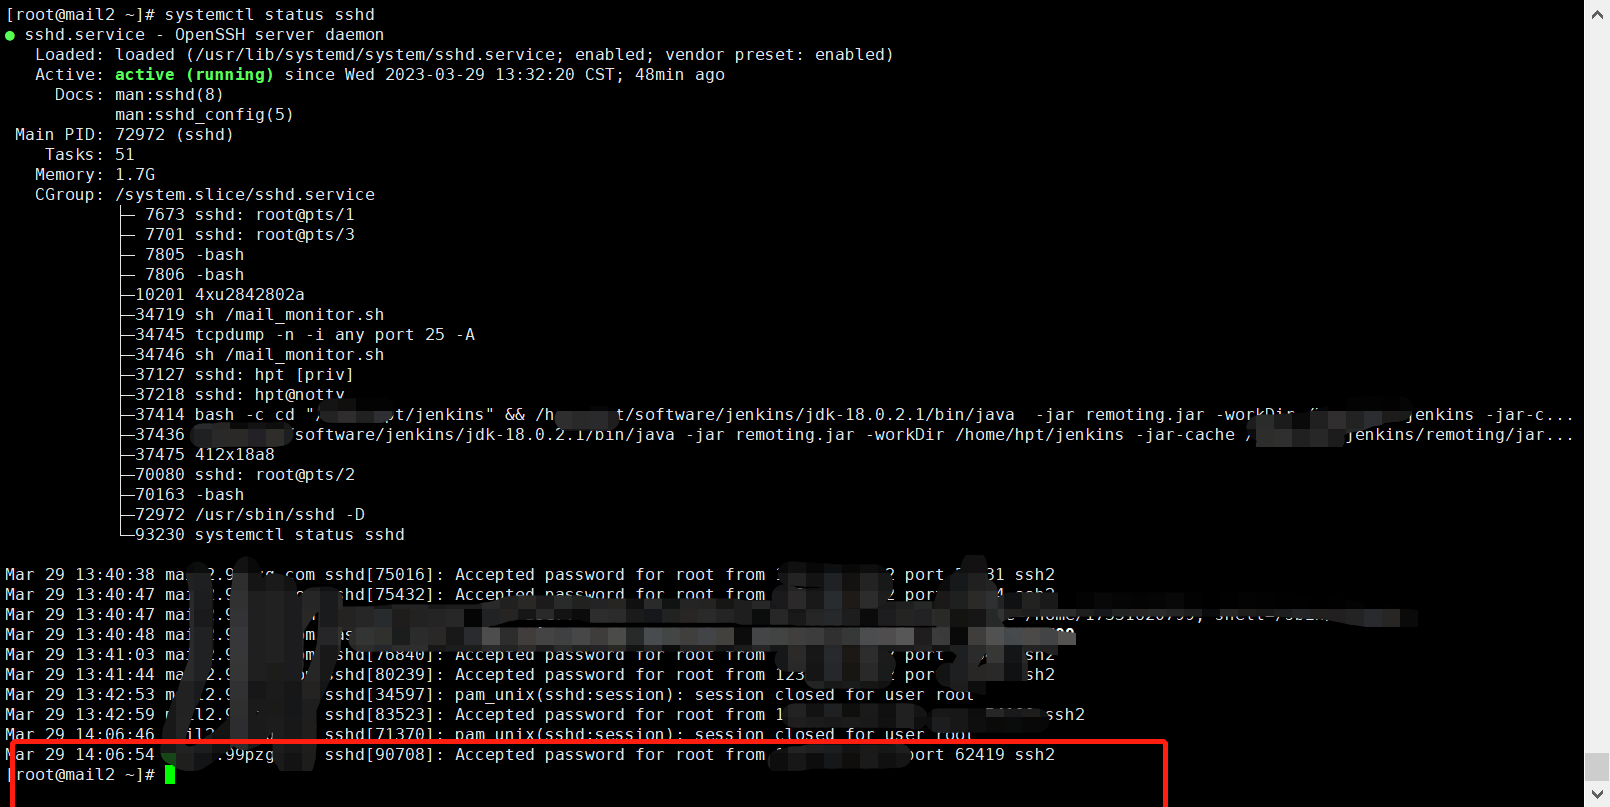
正常来说有报错会在这里显示的,除非已经解决,就比如我已经解决了就看不到了。
也可通过 journalctl -u sshd 来查看日志报错
journalctl -u sshd翻到这几天连接不到的日期,来查看;

同样也可以查看这个报错:“pam_systemd(sudo:session): Failed to create session: Failed to activate service 'org.freedesktop.login1': timed out”
总结问题
通过以上几种排查错误信息的方式来看,就发现了一个报错;
报错信息:pam_systemd(sudo:session): Failed to create session: Failed to activate service 'org.freedesktop.login1': timed out
解决方式
Failed to create session: Failed to activate service 'org.freedesktop.login1': timed out以上报错的信息大致意思如下:
dbus的服务重启后,
systemd-logind服务没有重启导致,可以查看systemctl status systemd-logind的状态,解决方法就是重启该服务systemctl restart systemd-logind
重启systemd-logind服务后,发现ssh可以秒连接了
- 总结:重启
systemd-logind服务即可
systemctl restart systemd-logind问题解决